I have some more useful learnings around customization of Hubs Cloud to share! If you want a refresher on what Hubs Cloud is, give my overview post a read. As the title suggests, this post is a technical overview on how to get WordPress REST data to inject html content in your Hubs Cloud home page. This is a very basic example, but explains how you can navigate local workflow, CORS, and utilize an API in Hubs.
The reason I set out to accomplish this is because I wanted a way to decouple the design aspects of a Hubs Cloud instance from the core tech. Simply, I want to give someone content creation power without the ability to break the app. WordPress has an amazingly rich content editor and a REST API that can serve that final markup. A perfect match! This very website you're reading was my data source for the experiment.

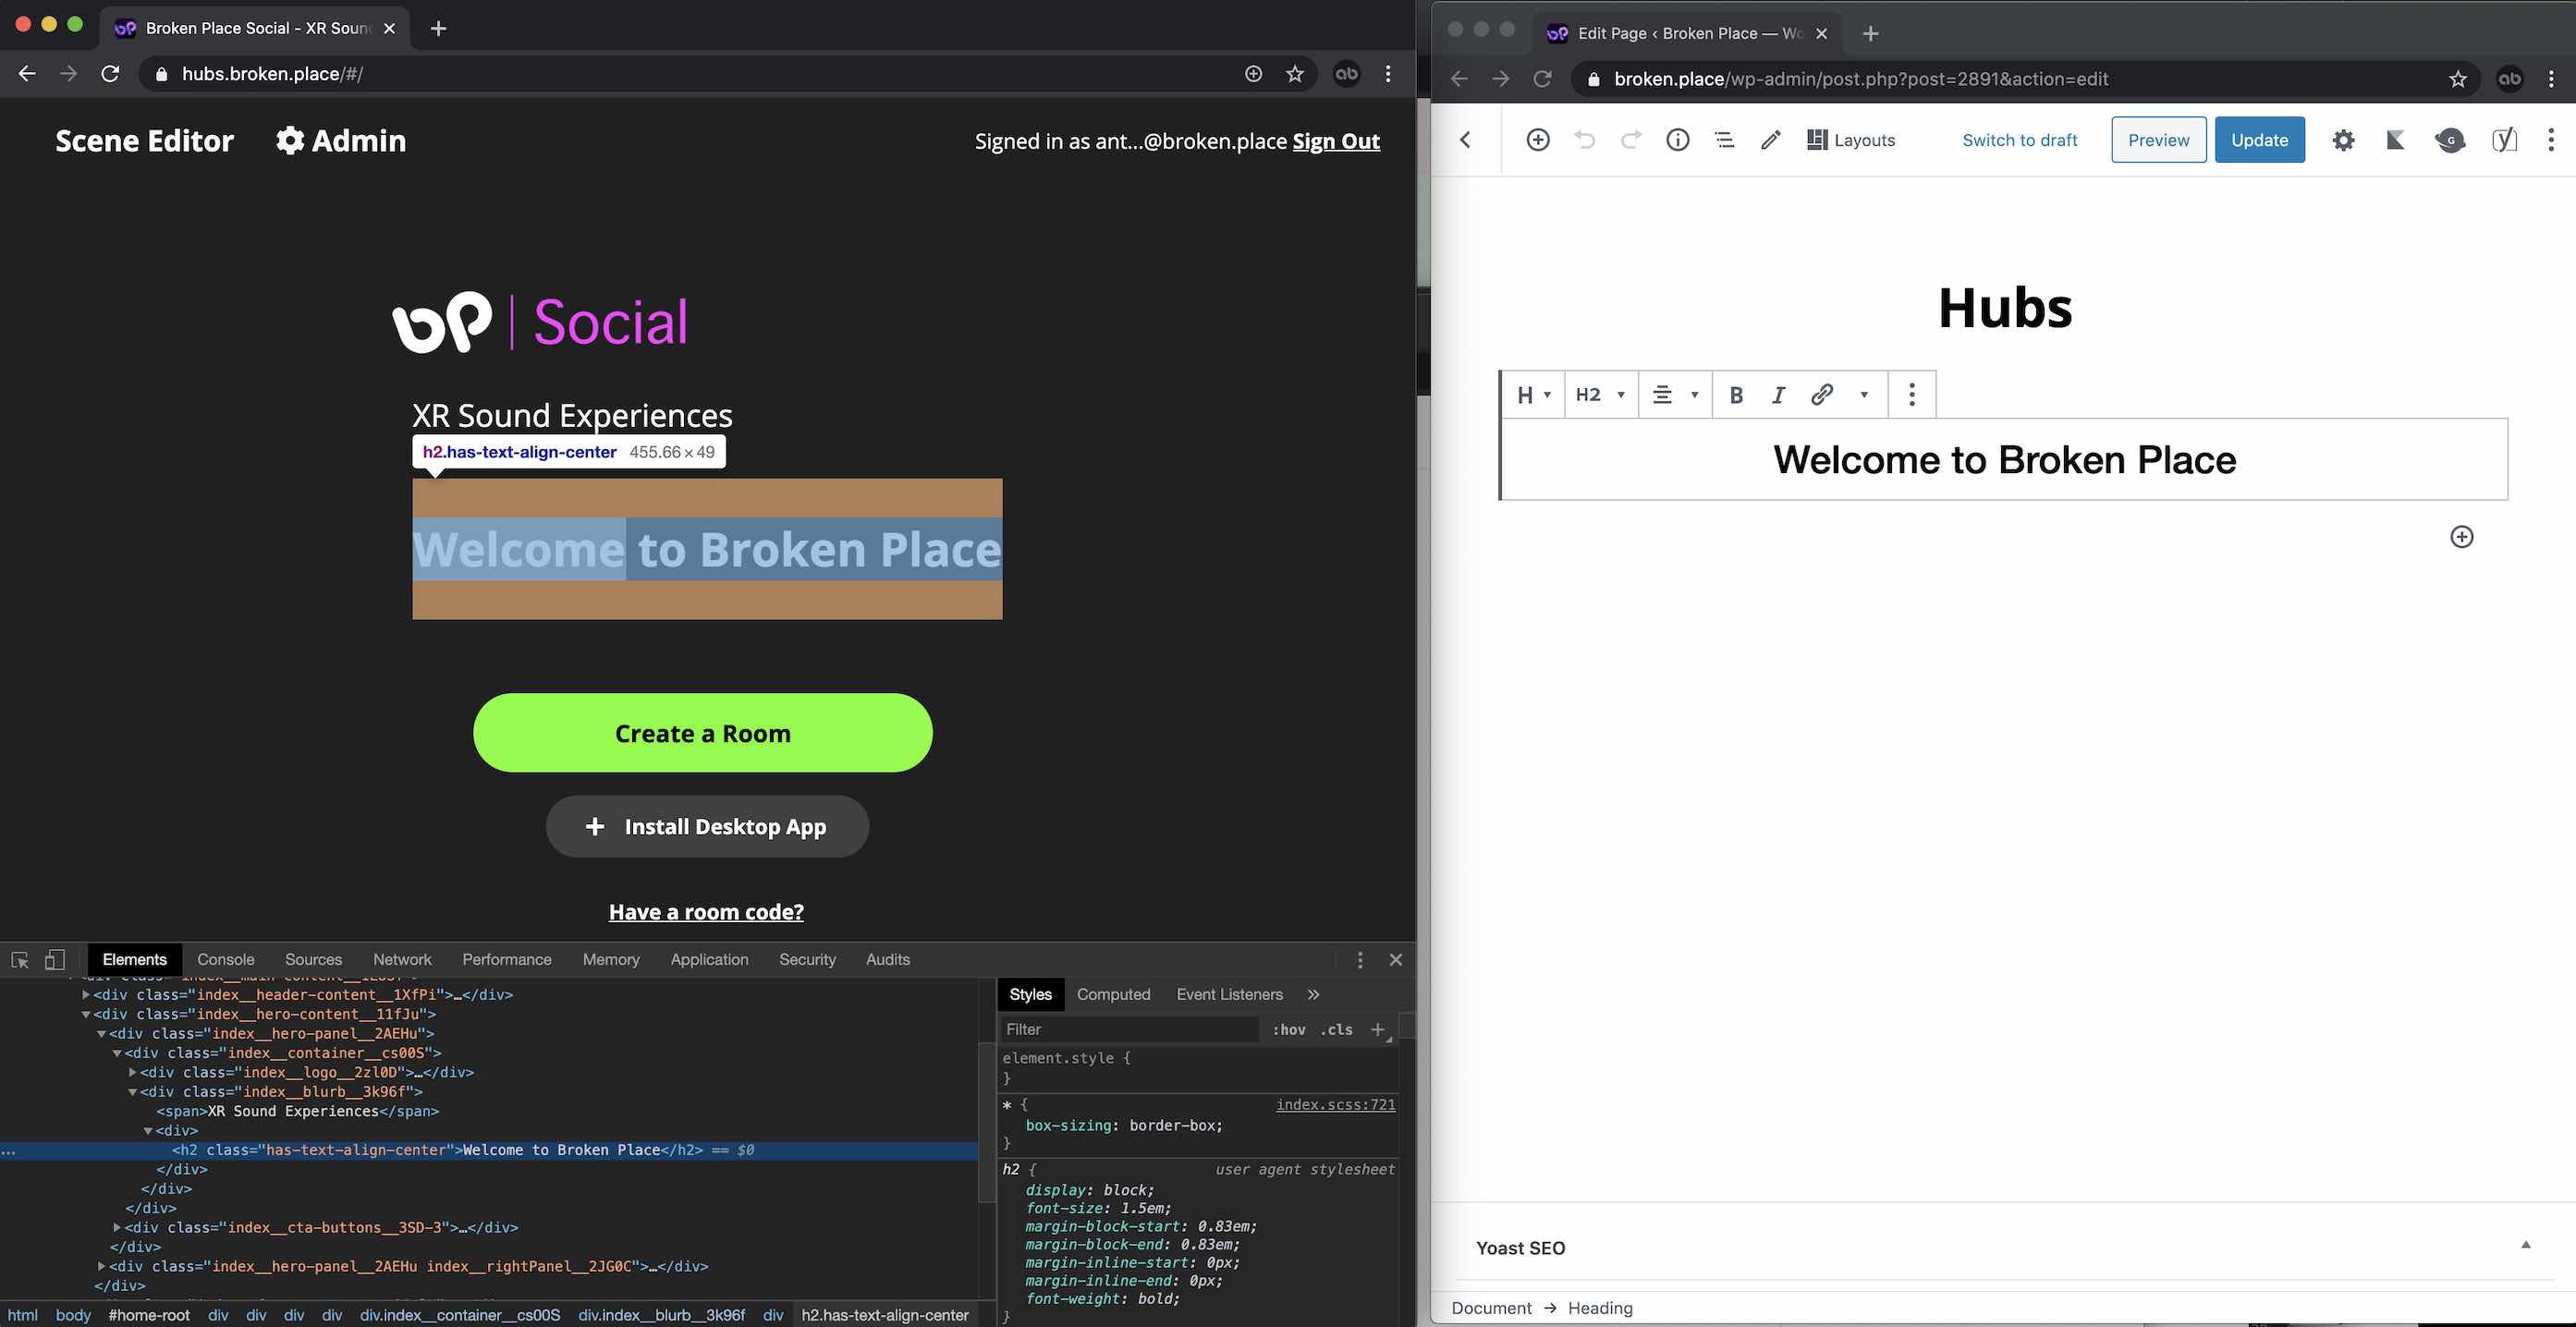
Then end goal was the following image which illustrates WordPress managed content rendering below the site logo in a Hubs Cloud instance.

Prerequisites
- A WordPress (or any API serving markup)
- A Page in that WordPress (this houses the markup mentioned above)
- A Hubs Cloud instance (Quickstart Guide here)
Local Hubs Environment setup
I'll assume you have the above ready to go. For this project, I'd recommend forking Hubs to track your changes. I'll step through how to add a package and update your client to include and use that package. Have a terminal handy!
First, set up your custom client by creating a fork of Hubs and clone it locally to wherever you wish to work. From the root directory of the fork run npm ci then npm run login to connect your local up to your Hubs Cloud instance. Follow the prompts and click the sign in link sent to your email. If you want to see your local version, run npm run dev to start the dev environment. Once compiled, you should be able to resolve your app by visiting https://localhost:8080/. This command will also watch for changes in the files so you can start development of new features.
Note: you may get a warning in your browser when attempting to access localhost via https. You might need to do some browser hacks to allow localhost to load securely without a valid cert. I use Firefox and set options to trust the url and proceed.
Getting in the code
For the library to parse the REST response I used Axios as it was a super simple framework to set up. Add Axios to the dependencies section of your package.json in the root of the repo.
  "dependencies": {
    "axios": "0.19.2",
After adding the package, I typically delete the node_modules and package-lock.json before running npm install which regenerates the dependencies and a package-lock file. Running install will set your app up to use the Axios functions. After a successful install, run npm run dev to start watching for changes again. Leave that open in the background and use it to debug/compile. Every file that is saved in your local will reinitialize a build. This should give you instant debug feedback.
Editing the Hubs Home Page
The home-root.js file in the react component library of Hubs is where the rendering logic of the home page is located. I placed my markup in there, but feel free to be more organized and clever than me.
You'll want to import axios into home-root.js
import axios from "axios"; Then add a state within the component for your markup. I named mine data.
  state = {
    data: null,
    dialog: null,
    signedIn: null
  };
Next, you'll want to prepare your data by using the axios.get function. I chose componentDidMount to do this with. In the below example, I'm directly hitting the ID of my WordPress page endpoint to return the markup. Use setState on data as res.data.content.rendered which will store the final rendered content area from your WordPress page.
  componentDidMount() {
    axios.get(`http://broken.place/wp-json/wp/v2/pages/2891`)
    .then(res => {
      this.setState({
        data: res.data.content.rendered
      });
    })
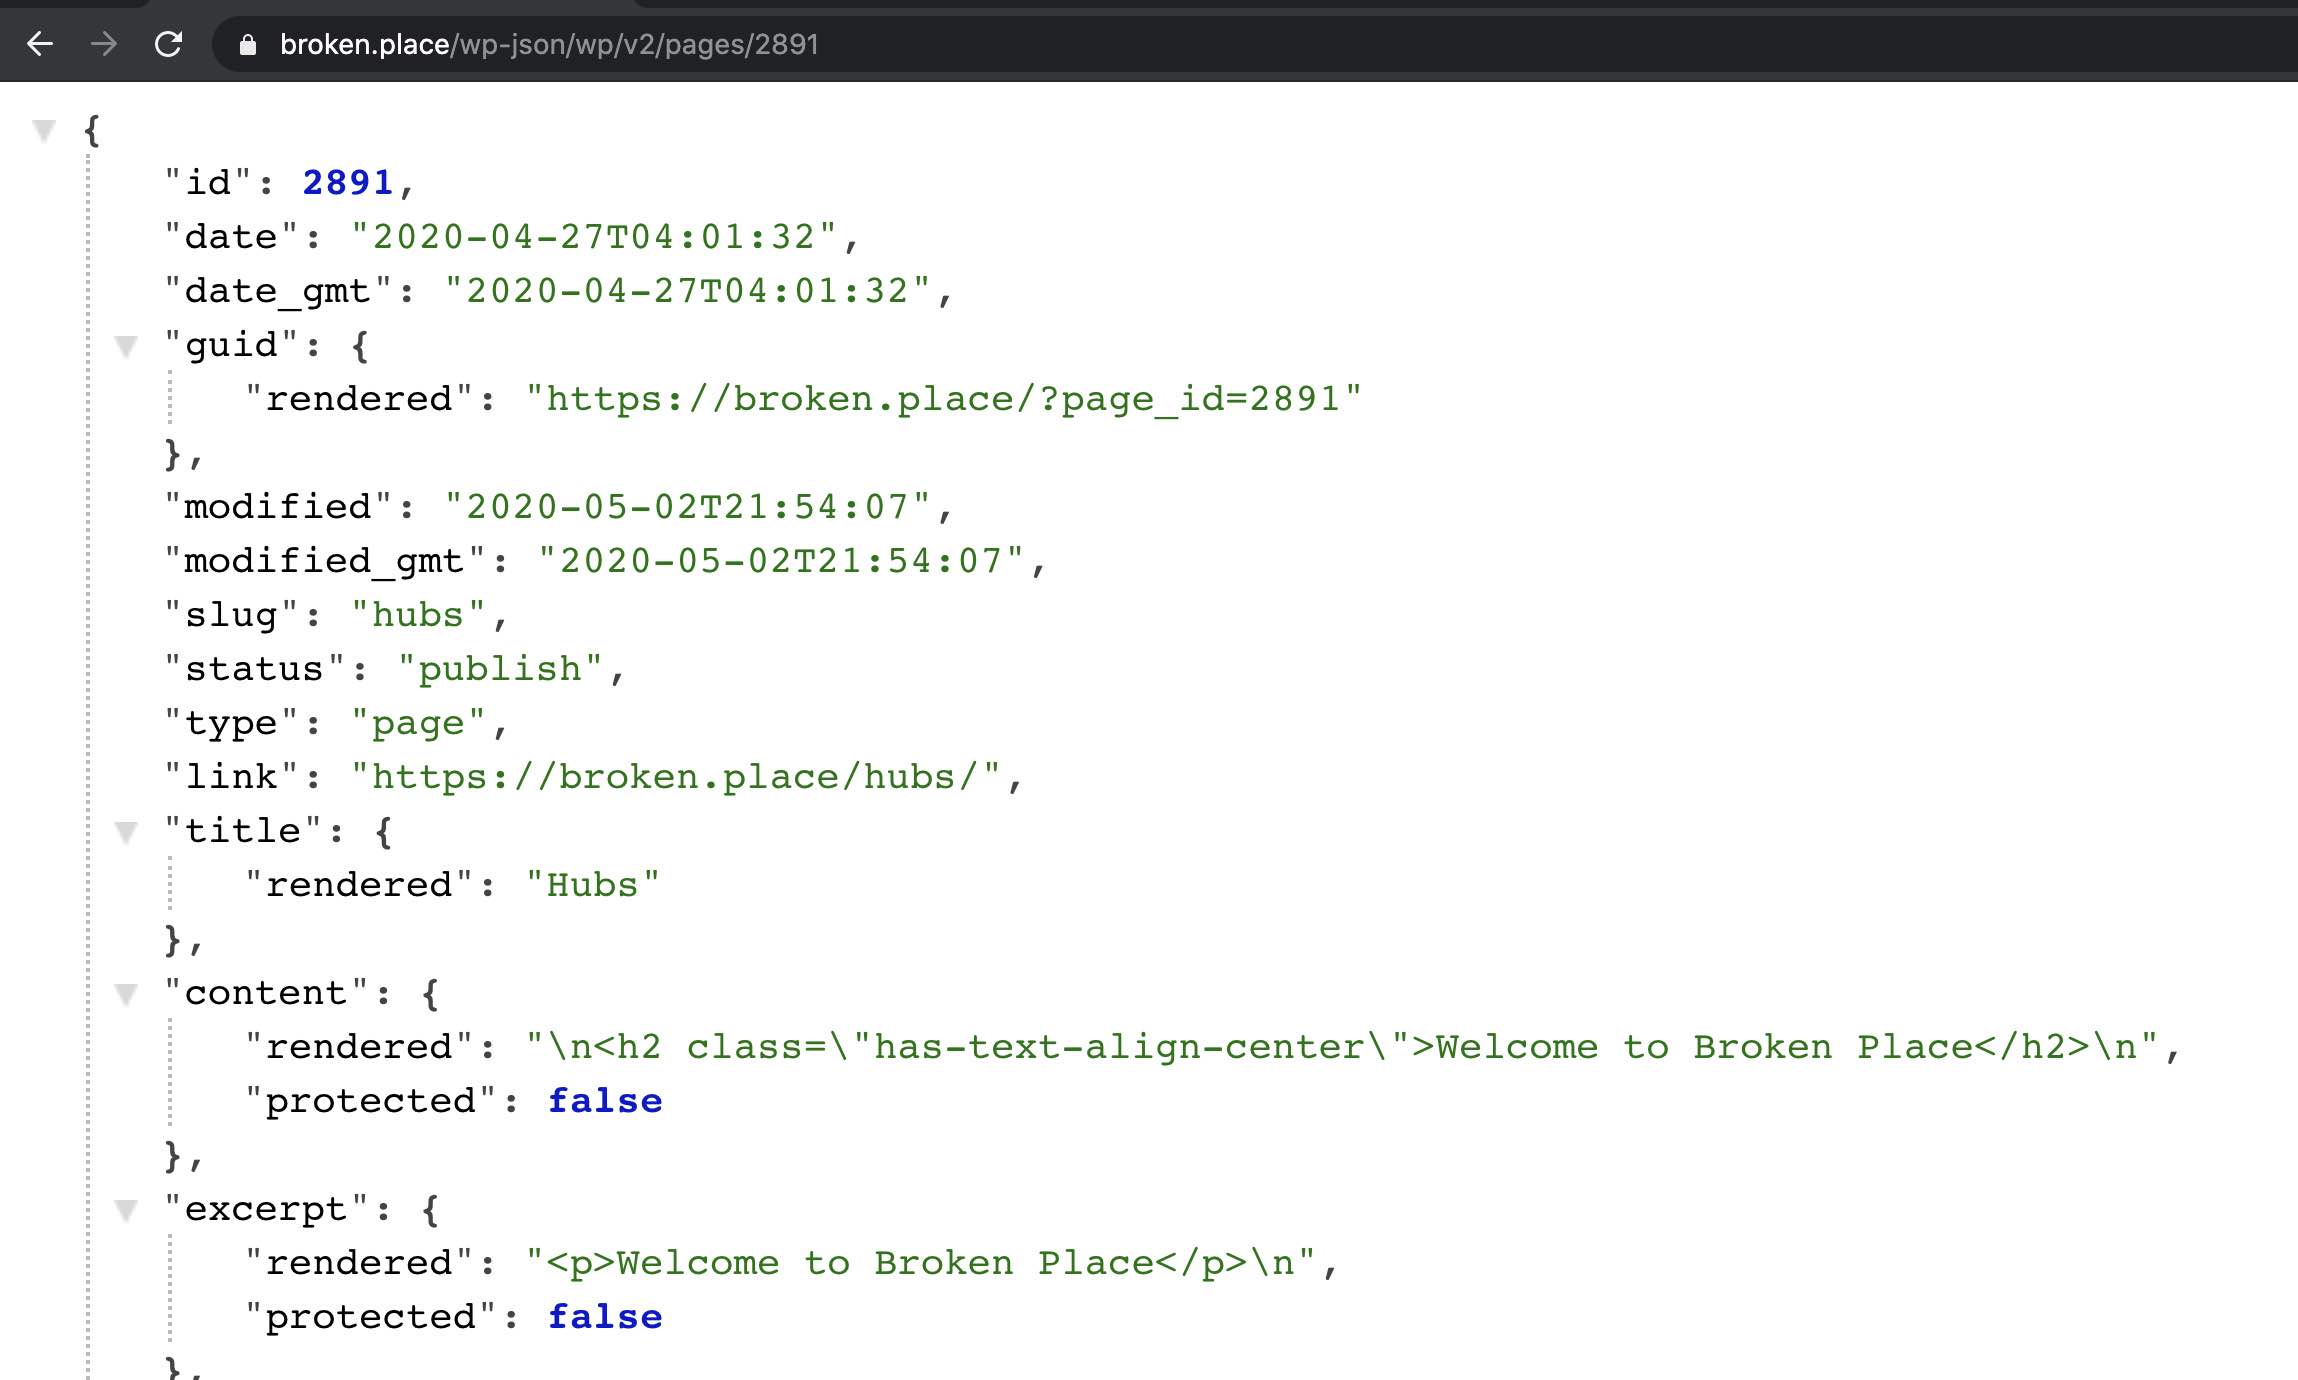
In the below image, the content->rendered data is what we are using. Notice it is the markup of the end product image example at the start of this post.

In Hubs, the best place I found to render the markup of my page was in the hero functions named renderNonFeaturedRoomsHero and renderFeaturedRoomsHero.
Using the dangerouslySetInnerHTML function, we can display the markup from our WordPress page inside the render.
<div
  dangerouslySetInnerHTML={{
    __html: this.state.data,
  }}>
</div>
Here is a link to a diff between my changes and home-root.js master: https://github.com/mozilla/hubs/compare/master...antpb:headless-hubs-bp#diff-ca3a521596d66872026a7eff939c860dL1
Deploy your client
If your custom client is rendering and compiled successfully, you may be ready to deploy. Hubs has a helper script to deploy using the login credentials from the command at the beginning of this post. To deploy, kick off npm run deploy and sit back while the client and admin build. Once this script uploads and deploys, you probably wont see your changes on your Hubs Cloud instance. You may immediately notice the API content is nowhere to be found on the live instance! On to the fix and bane of development experience, CORS.
Hubs CORS configuration
Cross-Origin Resource Sharing (CORS) is what validates that the content being pulled to your site is legitimate and trusted. The reason your markup is not populating is because the server needs configuration to be set to allow certain domains to provide resources. Hubs by default has lots of the groundwork to mange these trusted sources and even has a settings panel in the admin area to manage your own. Here's where we fix our issue of content not rendering on our newly deployed custom client.
In the advanced tab of Server Setup ( /admin#/server-setup ) you will find a long list of customizable settings like headers, CORS, Javascript, etc.
Search for the field titled "Extra Content Security Policy connect-src Rules." and also img-src. In these sections you will need to add the source of your API. In my case, it is http://broken.place.

Next, you'll want to add your "Allowed CORS Origins" which is the last option at the bottom of the settings list. In this section you will want to list the domains you expect content from. Put a comma between each source. IMPORTANT: Be mega sure to include all the domains that your Hubs Cloud instance utilizes as well as the extra sources that your are receiving data from. In my experience, forgetting my backend and primary Hubs domain locked me out. Be warned!
Below is what mine looked like:

Once you've saved these options, clear your browser cache and you should start seeing your new custom homepage render!
Wrap up - the beyond
I hope this article helps you understand how to configure and deploy your own custom client as well as interact with outside origins in your Hub. It goes without saying that this method can be applied to any custom functionality you add to your Hubs Cloud instance. I have some work to do still on utilizing the stylesheets from the parent domain to unify the styling. I also hope to build a content block in WordPress where you can define a Hubs room ID and render the number of participants in the room. This would give the ability to control the layout of featured rooms on the home page!

Anthony Burchell
Founder, Broken Place
Leave a Reply