XR Music Playscapes
Automating Hubs Cloud Deployment Using CircleCI
I use CircleCI to maintain code quality and automate the deploy process for many of the web applications I manage. I recently sought to achieve that same configuration for my Hubs Cloud instances. This tutorial assumes that you already have a CircleCI account and understand the deploy process of Mozilla Hubs. If you’d like info on deployment, check out this blog post before you get started to get an overview of the manual deploy process.
The process is as simple as the following:
- Make a Production Branch
- Create a Login Script to be used by CircleCI
- Add login script to package.json
- Add
.circlecidirectory to root - Add CircleCI
.ymlfile inside of.circleci - Push changes to Production branch
Let’s get into it.
Add a production branch to a private fork of Hubs. This is what will be used as the deployment branch for your live site. I like to keep one fork private for my production instances and a separate public instance mirrored for contribution or sharing code. The goal of this configuration is to allow the deploy process to initiate when a pull request is merged. You can use this same approach to automate any number of tasks.
Create a login script for CircleCI:
Mozilla Hubs Cloud by default has a login script called login.js that is used as a step in the npm run deploy command. This command requires human input to provide the Hubs Cloud instance url and administrator email address. We can work around the human input in CircleCI by hard coding our information in a similar script. CAUTION, you don’t want to be showing off your admin email in a public fork so try to utilize circleci environment variables when defining your admin address. For this tutorial example, I’m plain texting them because it will be easier to understand.
Your login script will live in hubs/scripts alongside the other npm scripts. It’s almost identical to the login.js with a few tweaks to the variables. Below is a copy of mine. Feel free to make your own flavor!
Add your login script to package.json
Next, you’ll need to add this custom login script to package.json so that the automation has a reference. In line 27 below, I added mine called login-bp.
Add a CircleCI directory and config.
Create a directory named .circleci in the root of your repo and create a config.yml file inside that matches the below. Be sure to change the script name in line 36 to whatever you define for your login script.
Push those changes to your production branch and you should be all set. Time to test!
Create a new branch to pull request and test.
Create a new branch named however you would like and make some visually different changes to your site. Once done, commit the changes and start a pull request against the production branch. You should see that the PR is starting tests to make sure that the incoming changes are deployable.
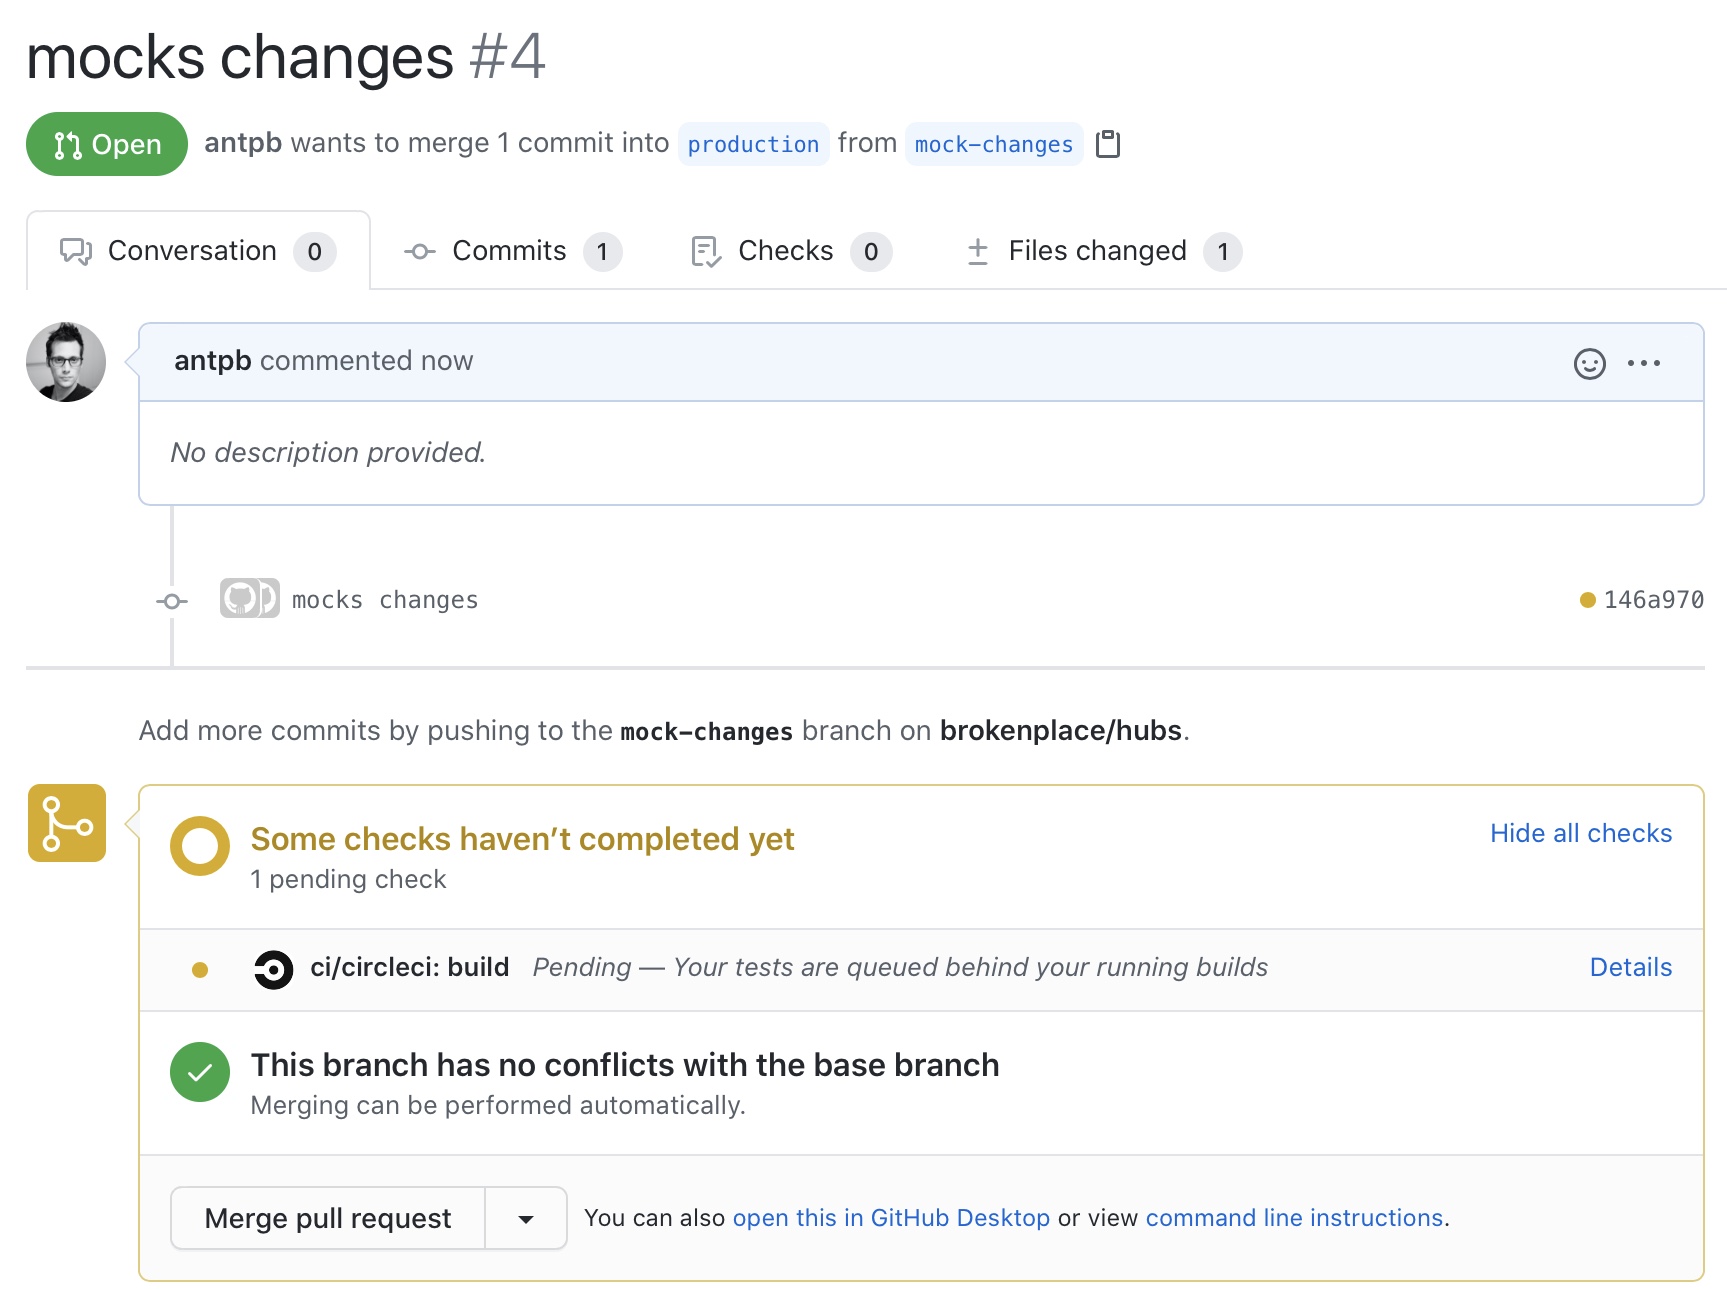
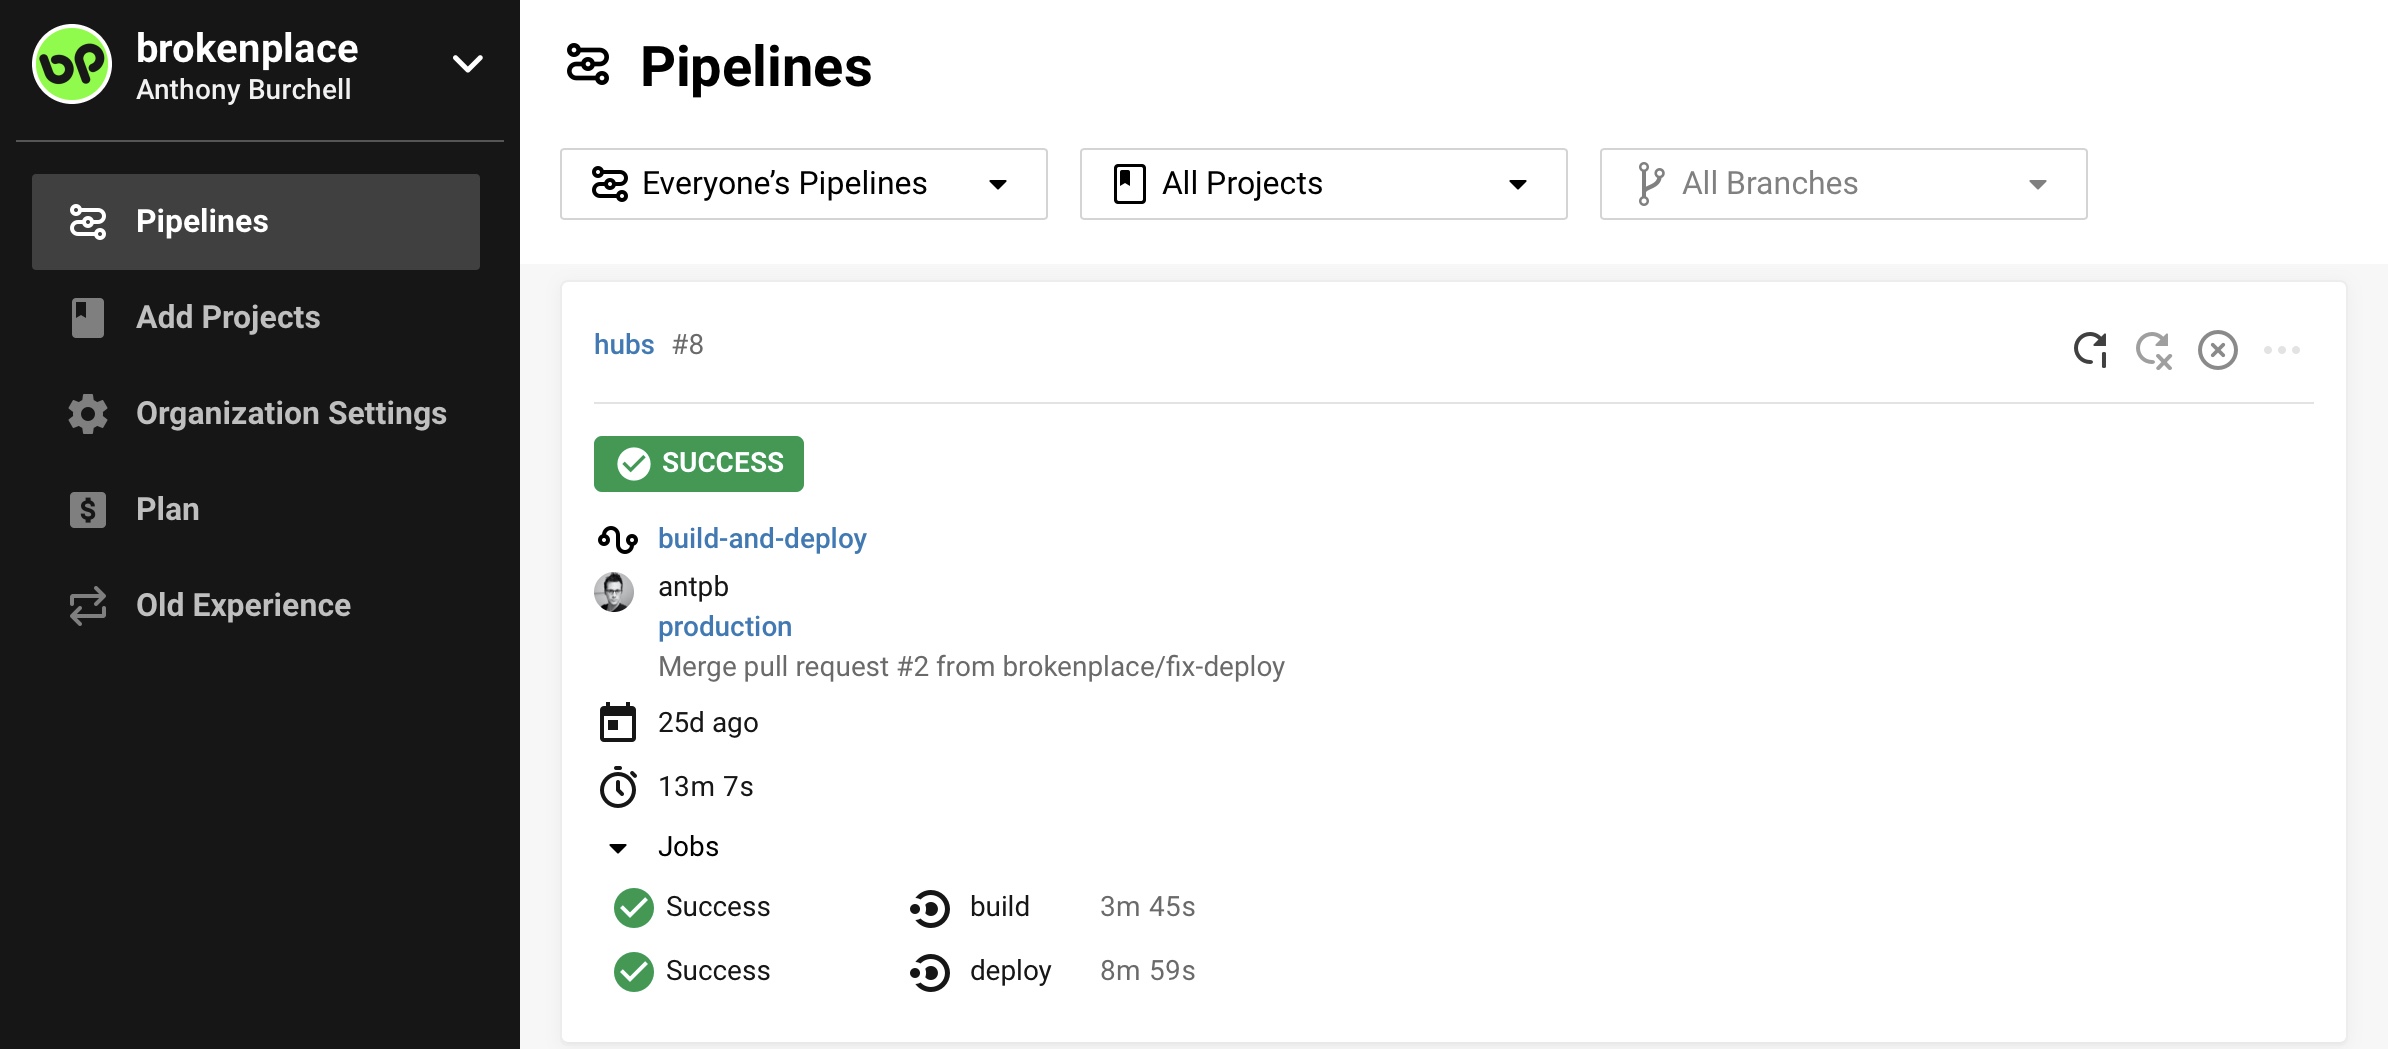
When you’re ready to merge those changes, have your phone or mail client near because the script will initiate the AWS SES to email you a login request from CircleCI. Click the login link, and let CircleCI do the rest. After a while you’ll see the build is a success which means that you can check your live site to see the changes reflected.
You did it! Hopefully. If not, let me know in a comment where you struggled and I'll see if I can help.
Powering a Hubs Cloud homepage with WordPress - and beyond!
I have some more useful learnings around customization of Hubs Cloud to share! If you want a refresher on what Hubs Cloud is, give my overview post a read. As the title suggests, this post is a technical overview on how to get WordPress REST data to inject html content in your Hubs Cloud home page. This is a very basic example, but explains how you can navigate local workflow, CORS, and utilize an API in Hubs.
The reason I set out to accomplish this is because I wanted a way to decouple the design aspects of a Hubs Cloud instance from the core tech. Simply, I want to give someone content creation power without the ability to break the app. WordPress has an amazingly rich content editor and a REST API that can serve that final markup. A perfect match! This very website you're reading was my data source for the experiment.
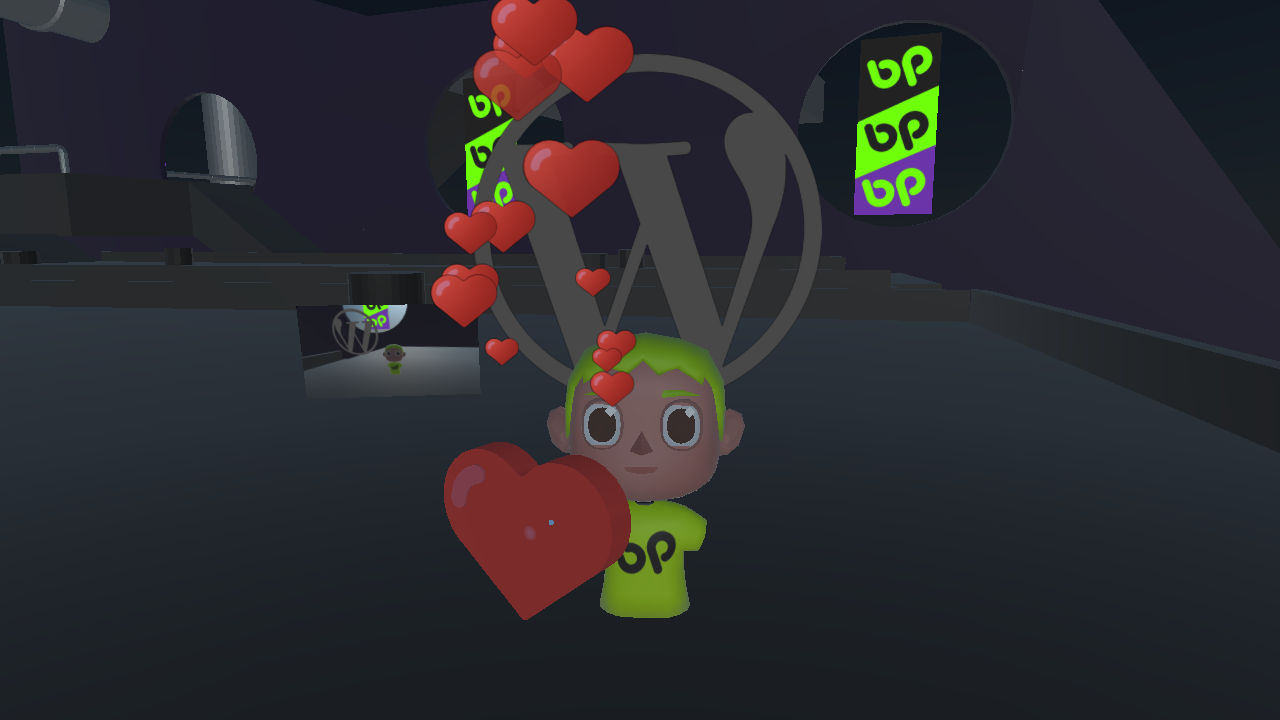
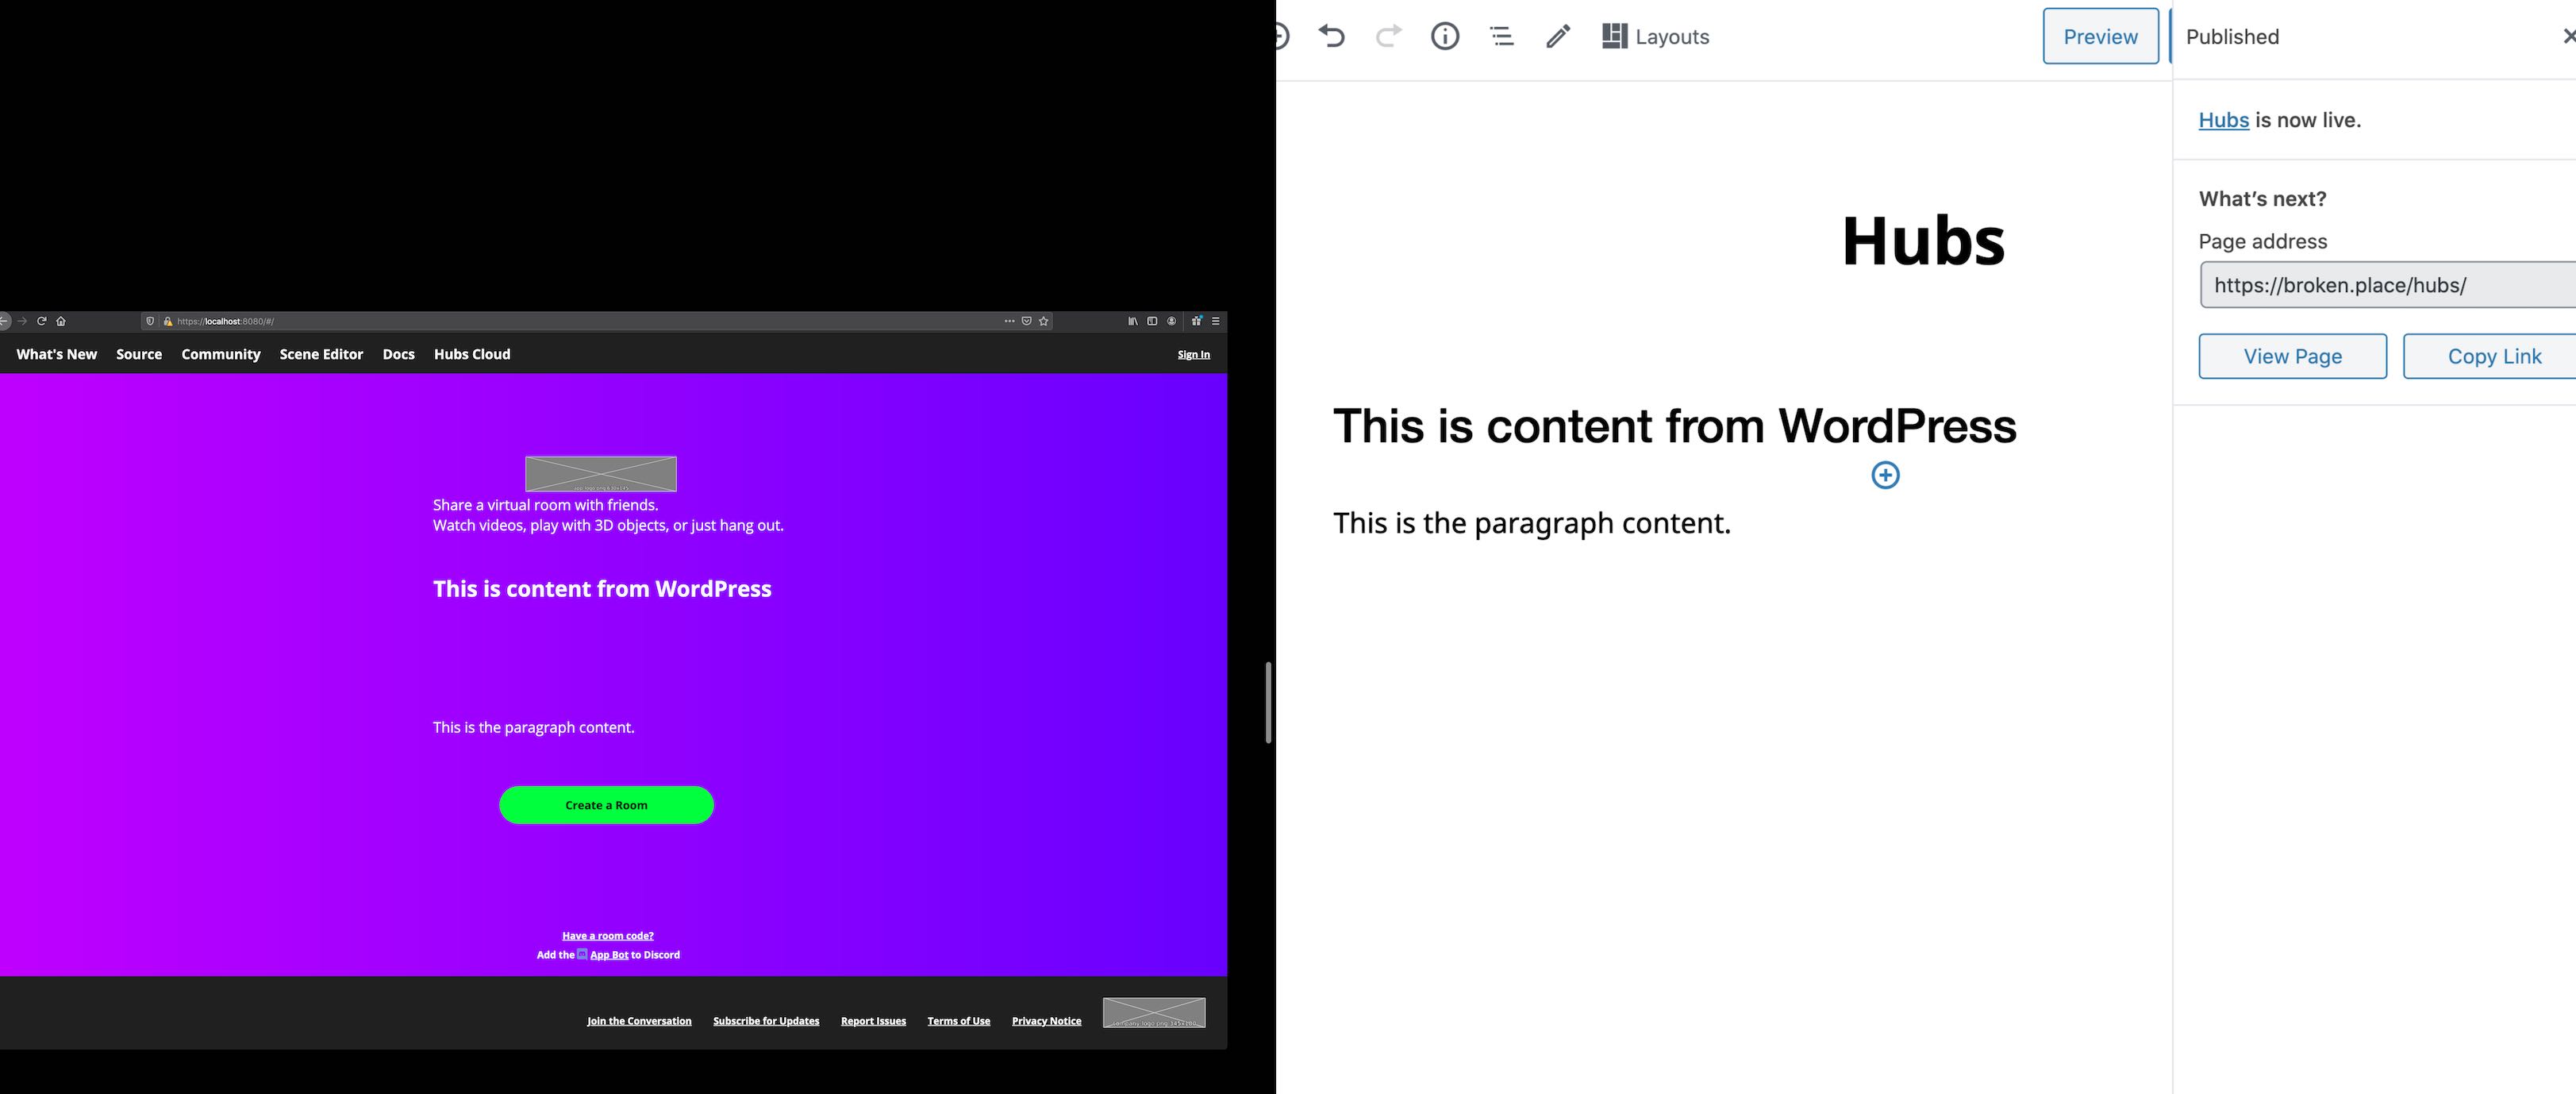
Then end goal was the following image which illustrates WordPress managed content rendering below the site logo in a Hubs Cloud instance.
Prerequisites
- A WordPress (or any API serving markup)
- A Page in that WordPress (this houses the markup mentioned above)
- A Hubs Cloud instance (Quickstart Guide here)
Local Hubs Environment setup
I'll assume you have the above ready to go. For this project, I'd recommend forking Hubs to track your changes. I'll step through how to add a package and update your client to include and use that package. Have a terminal handy!
First, set up your custom client by creating a fork of Hubs and clone it locally to wherever you wish to work. From the root directory of the fork run npm ci then npm run login to connect your local up to your Hubs Cloud instance. Follow the prompts and click the sign in link sent to your email. If you want to see your local version, run npm run dev to start the dev environment. Once compiled, you should be able to resolve your app by visiting https://localhost:8080/. This command will also watch for changes in the files so you can start development of new features.
Note: you may get a warning in your browser when attempting to access localhost via https. You might need to do some browser hacks to allow localhost to load securely without a valid cert. I use Firefox and set options to trust the url and proceed.
Getting in the code
For the library to parse the REST response I used Axios as it was a super simple framework to set up. Add Axios to the dependencies section of your package.json in the root of the repo.
  "dependencies": {
    "axios": "0.19.2",
After adding the package, I typically delete the node_modules and package-lock.json before running npm install which regenerates the dependencies and a package-lock file. Running install will set your app up to use the Axios functions. After a successful install, run npm run dev to start watching for changes again. Leave that open in the background and use it to debug/compile. Every file that is saved in your local will reinitialize a build. This should give you instant debug feedback.
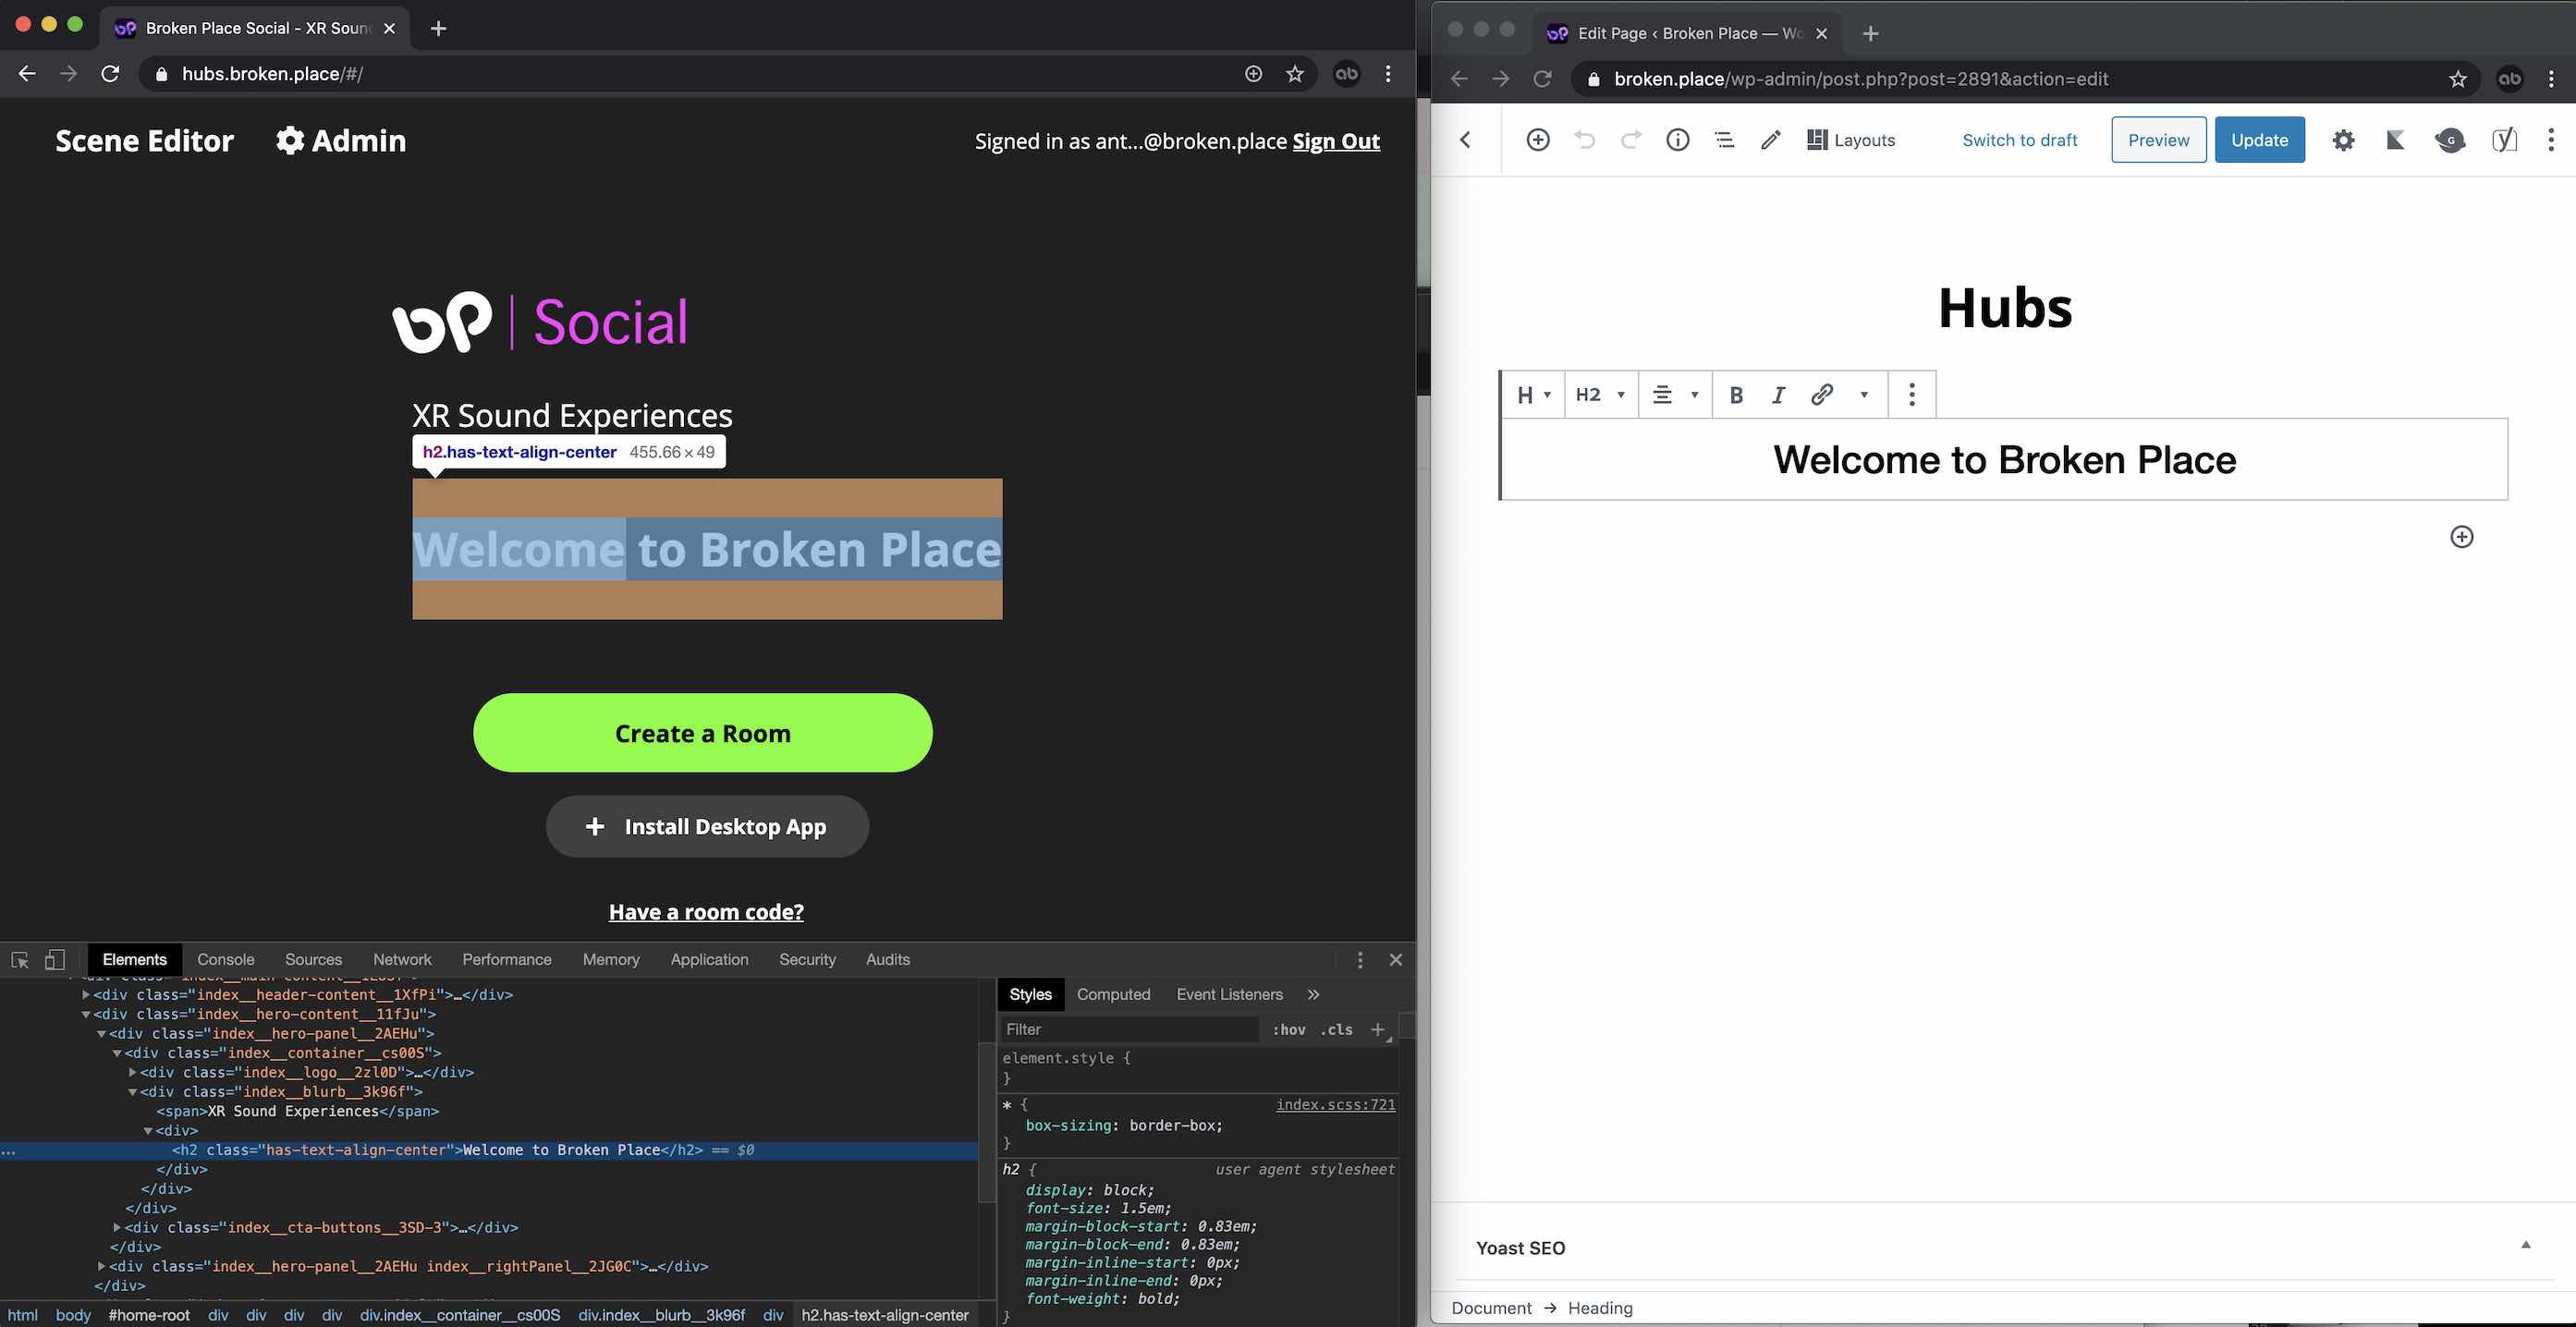
Editing the Hubs Home Page
The home-root.js file in the react component library of Hubs is where the rendering logic of the home page is located. I placed my markup in there, but feel free to be more organized and clever than me.
You'll want to import axios into home-root.js
import axios from "axios"; Then add a state within the component for your markup. I named mine data.
#/media/File:DataTNG.jpg)
state = {
data: null,
dialog: null,
signedIn: null
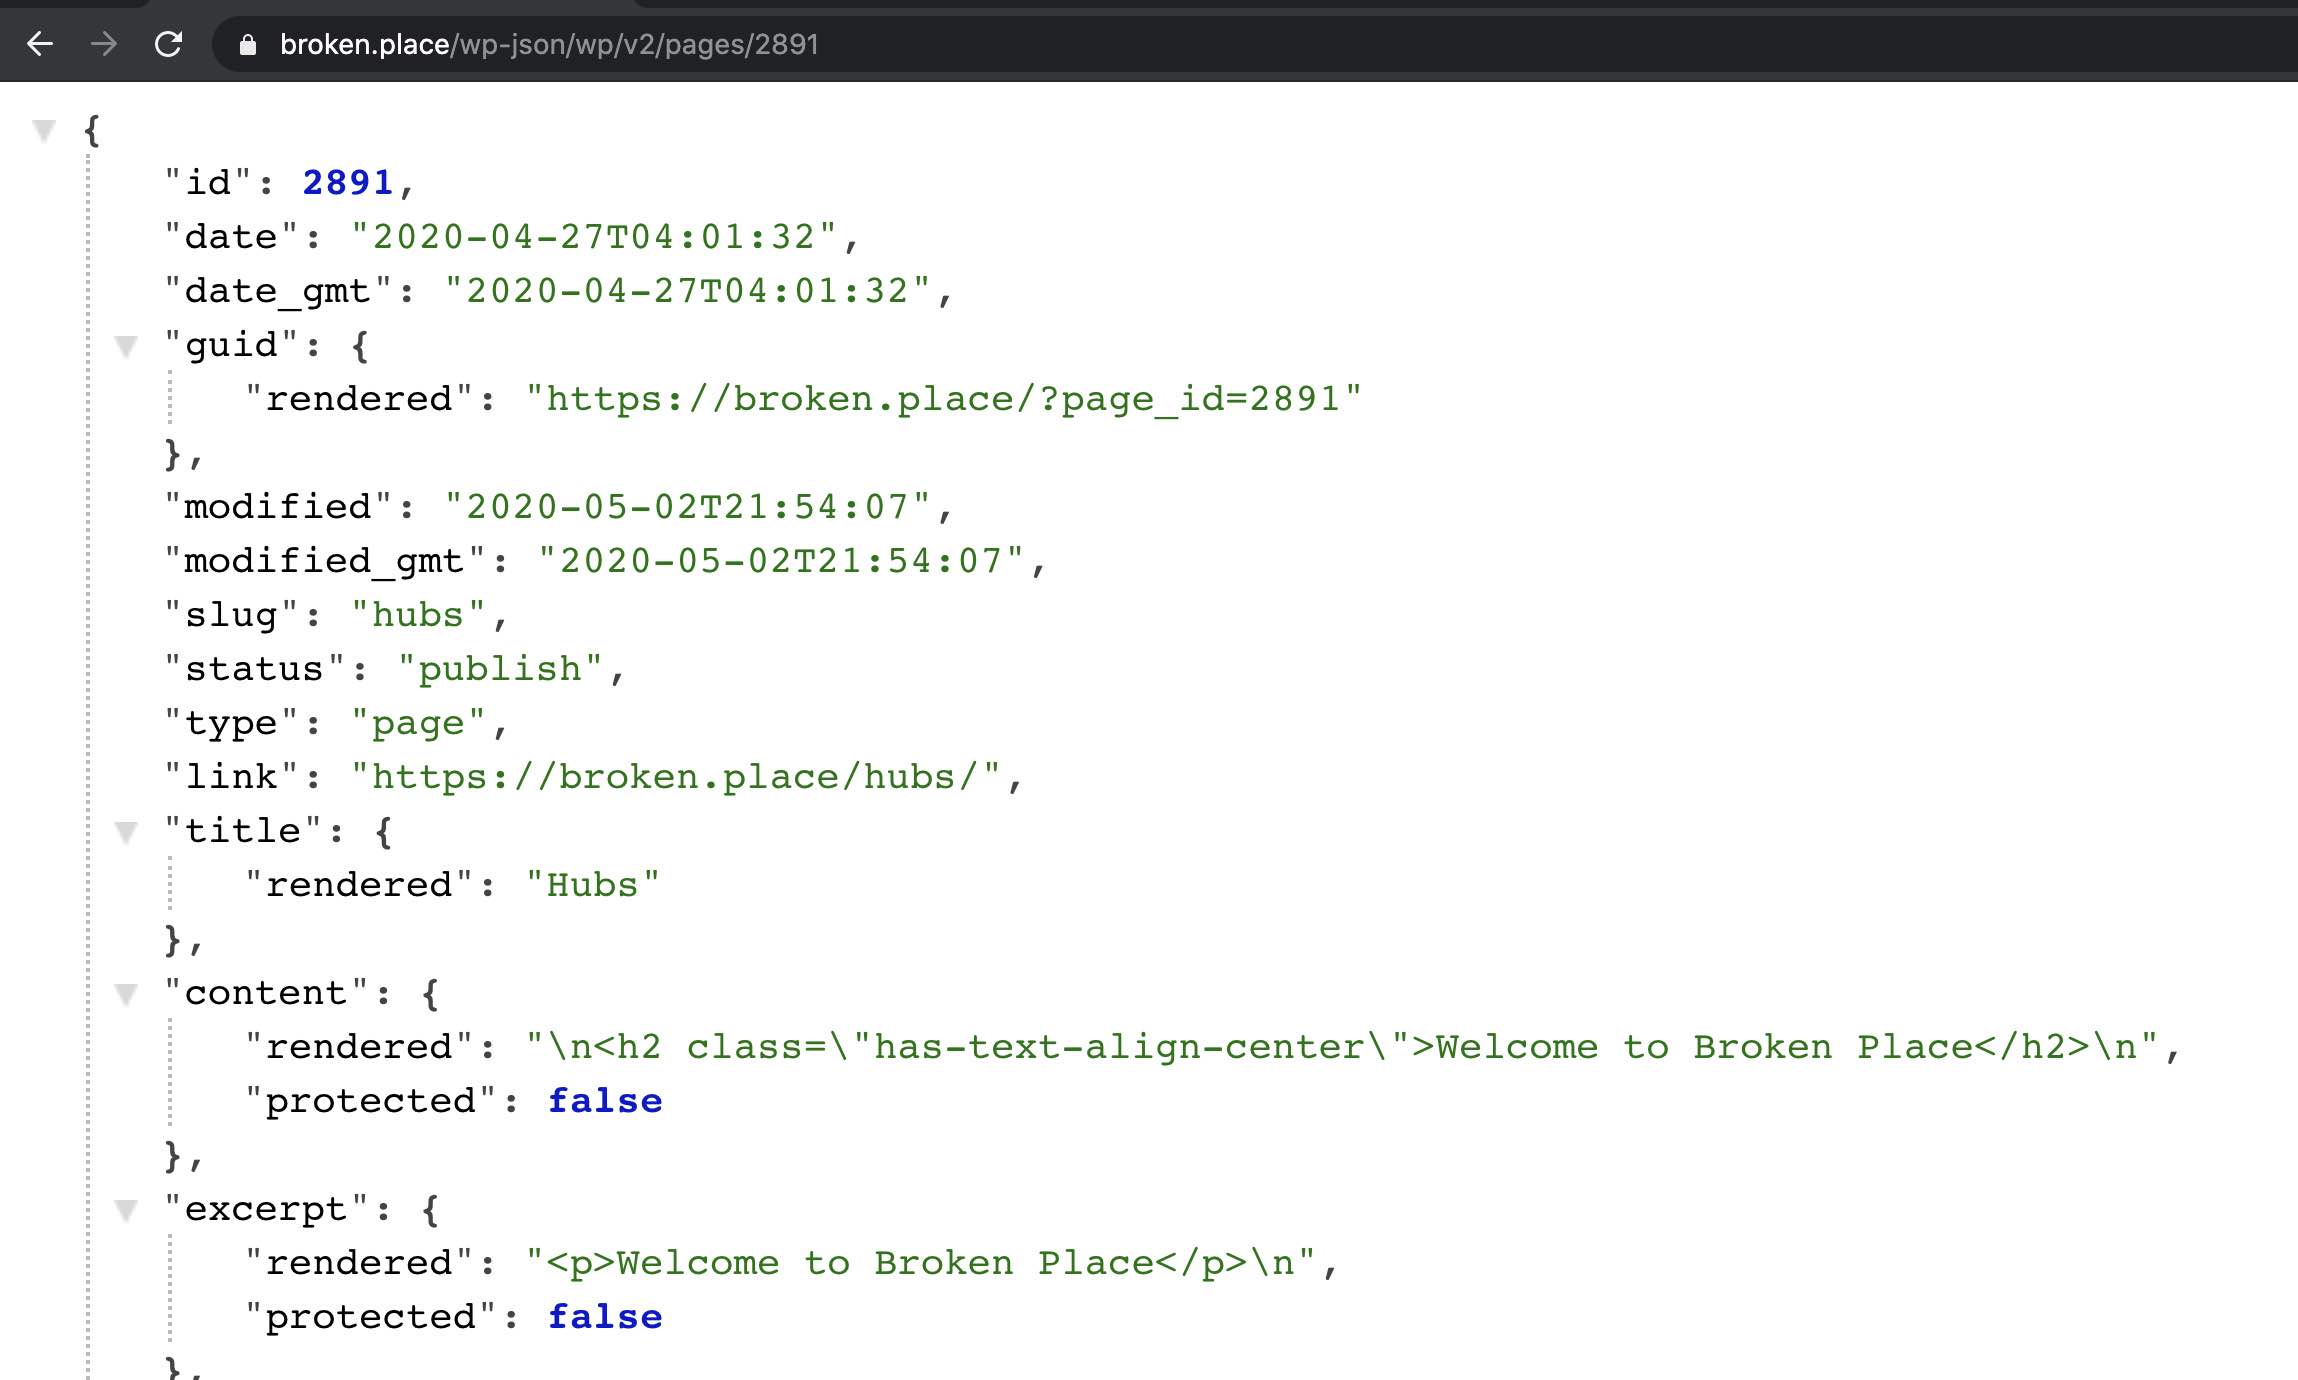
};Next, you'll want to prepare your data by using the axios.get function. I chose componentDidMount to do this with. In the below example, I'm directly hitting the ID of my WordPress page endpoint to return the markup. Use setState on data as res.data.content.rendered which will store the final rendered content area from your WordPress page.
  componentDidMount() {
    axios.get(`http://broken.place/wp-json/wp/v2/pages/2891`)
    .then(res => {
      this.setState({
        data: res.data.content.rendered
      });
    })
In the below image, the content->rendered data is what we are using. Notice it is the markup of the end product image example at the start of this post.
In Hubs, the best place I found to render the markup of my page was in the hero functions named renderNonFeaturedRoomsHero and renderFeaturedRoomsHero.
Using the dangerouslySetInnerHTML function, we can display the markup from our WordPress page inside the render.
<div
  dangerouslySetInnerHTML={{
    __html: this.state.data,
  }}>
</div>
Here is a link to a diff between my changes and home-root.js master: https://github.com/mozilla/hubs/compare/master...antpb:headless-hubs-bp#diff-ca3a521596d66872026a7eff939c860dL1
Deploy your client
If your custom client is rendering and compiled successfully, you may be ready to deploy. Hubs has a helper script to deploy using the login credentials from the command at the beginning of this post. To deploy, kick off npm run deploy and sit back while the client and admin build. Once this script uploads and deploys, you probably wont see your changes on your Hubs Cloud instance. You may immediately notice the API content is nowhere to be found on the live instance! On to the fix and bane of development experience, CORS.
Hubs CORS configuration
Cross-Origin Resource Sharing (CORS) is what validates that the content being pulled to your site is legitimate and trusted. The reason your markup is not populating is because the server needs configuration to be set to allow certain domains to provide resources. Hubs by default has lots of the groundwork to mange these trusted sources and even has a settings panel in the admin area to manage your own. Here's where we fix our issue of content not rendering on our newly deployed custom client.
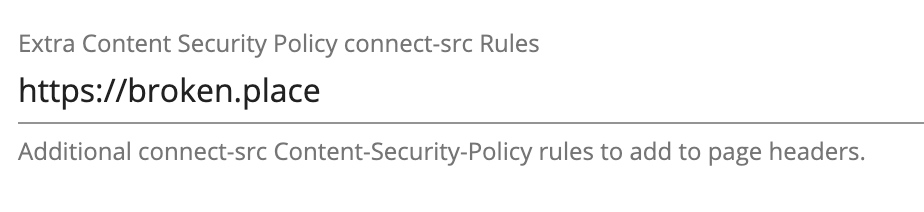
In the advanced tab of Server Setup ( /admin#/server-setup ) you will find a long list of customizable settings like headers, CORS, Javascript, etc.
Search for the field titled "Extra Content Security Policy connect-src Rules." and also img-src. In these sections you will need to add the source of your API. In my case, it is http://broken.place.
Next, you'll want to add your "Allowed CORS Origins" which is the last option at the bottom of the settings list. In this section you will want to list the domains you expect content from. Put a comma between each source. IMPORTANT: Be mega sure to include all the domains that your Hubs Cloud instance utilizes as well as the extra sources that your are receiving data from. In my experience, forgetting my backend and primary Hubs domain locked me out. Be warned!
Below is what mine looked like:

Once you've saved these options, clear your browser cache and you should start seeing your new custom homepage render!
Wrap up - the beyond
I hope this article helps you understand how to configure and deploy your own custom client as well as interact with outside origins in your Hub. It goes without saying that this method can be applied to any custom functionality you add to your Hubs Cloud instance. I have some work to do still on utilizing the stylesheets from the parent domain to unify the styling. I also hope to build a content block in WordPress where you can define a Hubs room ID and render the number of participants in the room. This would give the ability to control the layout of featured rooms on the home page!

Anthony Burchell
Founder, Broken Place
Hubs Cloud and how to build your own social VR platform.
Social VR is an incredible opportunity to transform our websites into physical spaces! The Mozilla Hubs team has developed a way to give individuals the power to host and control custom 3D experiences from their own managed infrastructure. They call it Hubs Cloud. Of the recent advancements in VR tech, I’ve been most excited about the browser focused Mozilla Hubs social platform. VR and AR will be an impactful force to view our digital content (websites) as a “real” spaces and it is my view that XR is the next natural progression of the web. Mozilla’s commitment to making that experience open is exciting for many reasons. Probably most important is that anyone can build and control their own platform. I see the same opportunity as when WordPress pioneered the CMS space all those years ago!
Hubs Cloud overview
Hubs is a social VR platform that allows folks to join a space together through almost any device. It offers some unique ways to collaboratively experience media and does so with special care around privacy. Best of all, it’s open source and they’ve developed it in such a way that you can host your own instance! Why would you do that? Well, for me, I was rapidly developing proof of concept prototypes in the social VR focus. I simply made a fork of Hubs and started adding my custom bits to achieve prototypes. I spun my first instance up November 2019 and, (humble brag detour) I was the first person spin one up successfully! Since then, I’ve been hosting the stack with very minimal costs and have done some amazing things with it. More on that in a bit.
If you have your doubts about VR barrier to entry, fret not as I've found the software is equally comfortable and immersive in the desktop non-headset experience. Liv Erickson wrote an excellent post on this topic that I highly recommend.
A bit about privacy in social VR.
There are massive challenges with privacy in VR. It seems folks are gravitating towards wanting private versions of social services. Many people have lost their trust in social media companies. The sheer scale of risk in data shared from XR devices has highlighted a need for standards to be set in relation to privacy. Mozilla has been leading the charge in social VR and how it relates to privacy. Their approach in respecting user data and minimizing the information needed to have shared experiences in Hubs is commendable. I also appreciate that they have acknowledged there is a line where things you do in the public virtual space should be understood as being public no different from reality. This brings many debates on how we should represent ourselves in XR spaces but I’ll save that for a future blog post. It’s very early still, and I’m by no means an authority on this topic, but the focus on privacy will be prominent as folks join our experiences. It’s important to call out and consider early.
My experience hosting an instance for half a year.
I configured my custom instance of Hubs Cloud on AWS early November 2019. I've seen an average cost of around $15 a month (using t3 micro.) The configuration was a very simple AWS CloudFormation template that offers the ability to set cost limits, assign keys, and set the size of server. My first instance was actually configured and taken live using my iPhone browser! In recent months I pumped my instance up to a medium size for peace of mind and that has increased my monthly cost by ~$5.
There’s additional config options in Hubs admin to save money using Cloudflare workers. Be sure to set that up early if you anticipate many or large assets. Here’s a link to the cost break down.
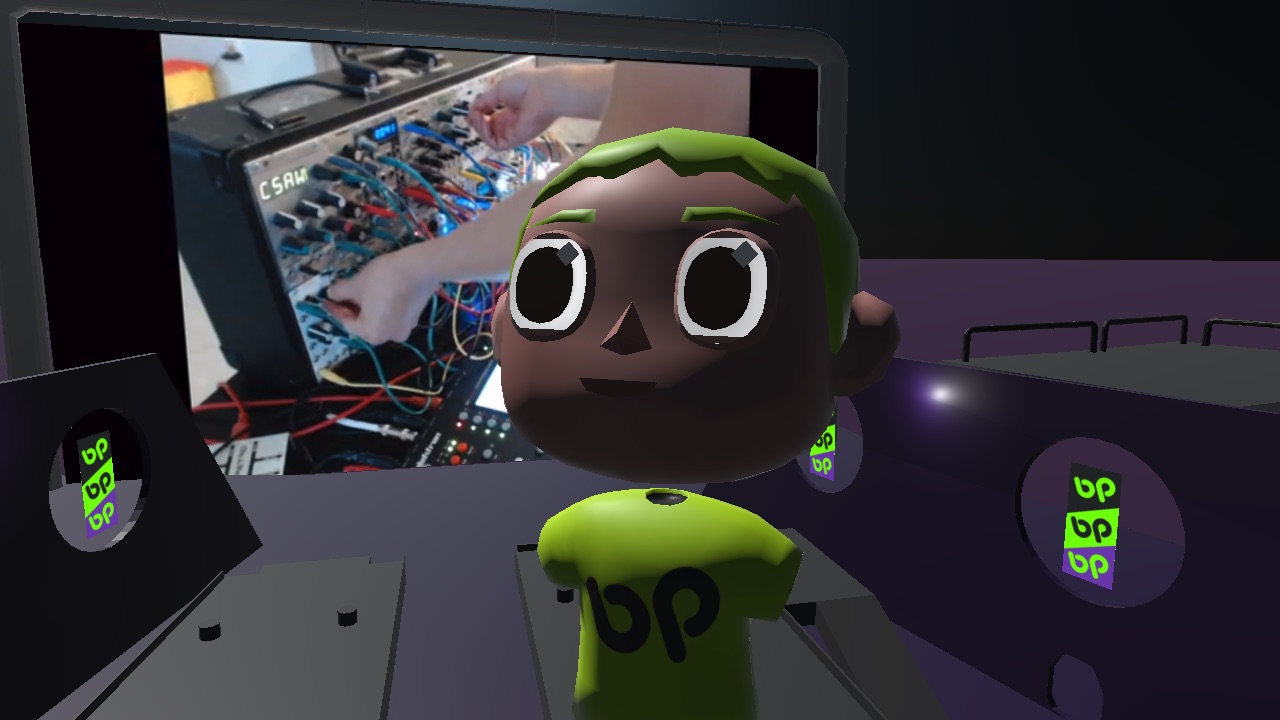
I have been primarily using my instance to experiment with live music performances in social spaces and also use it to showcase white labeled possibilities that brands may be able to utilize. The built in Spoke scene editor offers flexibility to design and manage spaces completely in the browser. In one of my more wild experiments, I built a native Unity app that broadcasted spherical panoramic video of a game to YouTube live. From there, the Hubs instance wrapped the youtube live video and audio stream around the audience in a 360 video textured skybox. The below video illustrates the proof of concept.
If you choose to get into the code and customize your Hubs instance, the deploy process is straight forward. It's as simple as a single deploy command! The first thing I did when I configured my local environment was customize the home page. I suspect home page customization will get easier sooner but if you'd like to do this currently, editing the home-root component will get you there fast. I've been experimenting with using WordPress REST data to manage the content of my home page and SEO meta. Here's a screenshot of that proof of concept. I'll dive deeper on the topic in a future blog post. 😉
Getting started building your own fancy Hub.
There are a few prerequisites that you should have ready. I struggled most on domain configuration. Don’t feel discouraged if you hit roadblocks in creating the stack; DNS is just hard. In my experience, it was easiest to have all domains controlled by AWS Route53, however, this is not a requirement. IMPORTANT: Follow this step by step guide when configuring up your instance. Below is just a synopsis of what you need to do. There are tiny steps between, so be sure to do the cooking by the book. 🙂
Domain Prerequisites:
- A primary domain that you wish to run this on. (Mozilla Hubs example is hubs.mozilla.com)
- A secondary domain that is used for short link sharing (I bought a really short
.linkTLD for mine) - A third, mostly invisible, domain for various back end tasks. (I used brokenplace.com as this is not seen by end users)
There are many ways to configure your domains so be sure to check out the documentation around domain recipes to find what works best for you.
Miscellaneous Requirements:
- AWS account.
- SSH Keypair configured with AWS. A handy guide on how to configure that can be found here.
- Cloudflare account if you want to save some money.
- SSL Certificate for your primary domain in the same geographic region you want your stack.
The setup can all be done in a single CloudFormation template. When you’ve finished the QuickStart guide steps prerequisites, go to hubs.mozilla.com/cloud and fill out the stack information. It’s important that your SSL cert and other resources exist in in the same region. You can validate your region by clicking the top right corner dropdown in the AWS console. During the stack creation, you may get an email from AWS to verify some of the resources. Be sure to click those links.
If you are using a primary domain managed outside of AWS, you’ll need to create a CNAME pointing to the stack. You can find that CNAME value in the Cloudfomation "Outputs" tab after a successful creation. Look for the "AddressForRootDomain" field and point your primary domain via CNAME to the value provided. It should resolve!
Deploy process.
When you’ve cloned the repo to your local be sure to install and build things fresh by running: npm ci
To connect your local copy to your instance run: npm run login This script will verify your admin user via e-mail and grant your computer push capabilities to the instance. Be sure you are using the machine that you configured the keypair for.
To deploy your local copy, from the repo root run: npm run deploy This task goes through the build process and deploys your local changes to the instance. When it’s complete you should be able to hit the site and see your changes.
Let me wrap this up...
I’m going to keep posting in the broken.place blog about my explorations in Hubs. I'll dive much deeper and will share what I learn through posts like this. There have been many learnings in the area of spatial audio, scene optimization, and various workflow tips that I'd love to share. Let me know if you have set up your own Hubs Cloud! I’m curious what others are interested in doing with this project.
Anthony Burchell
Founder, Broken Place